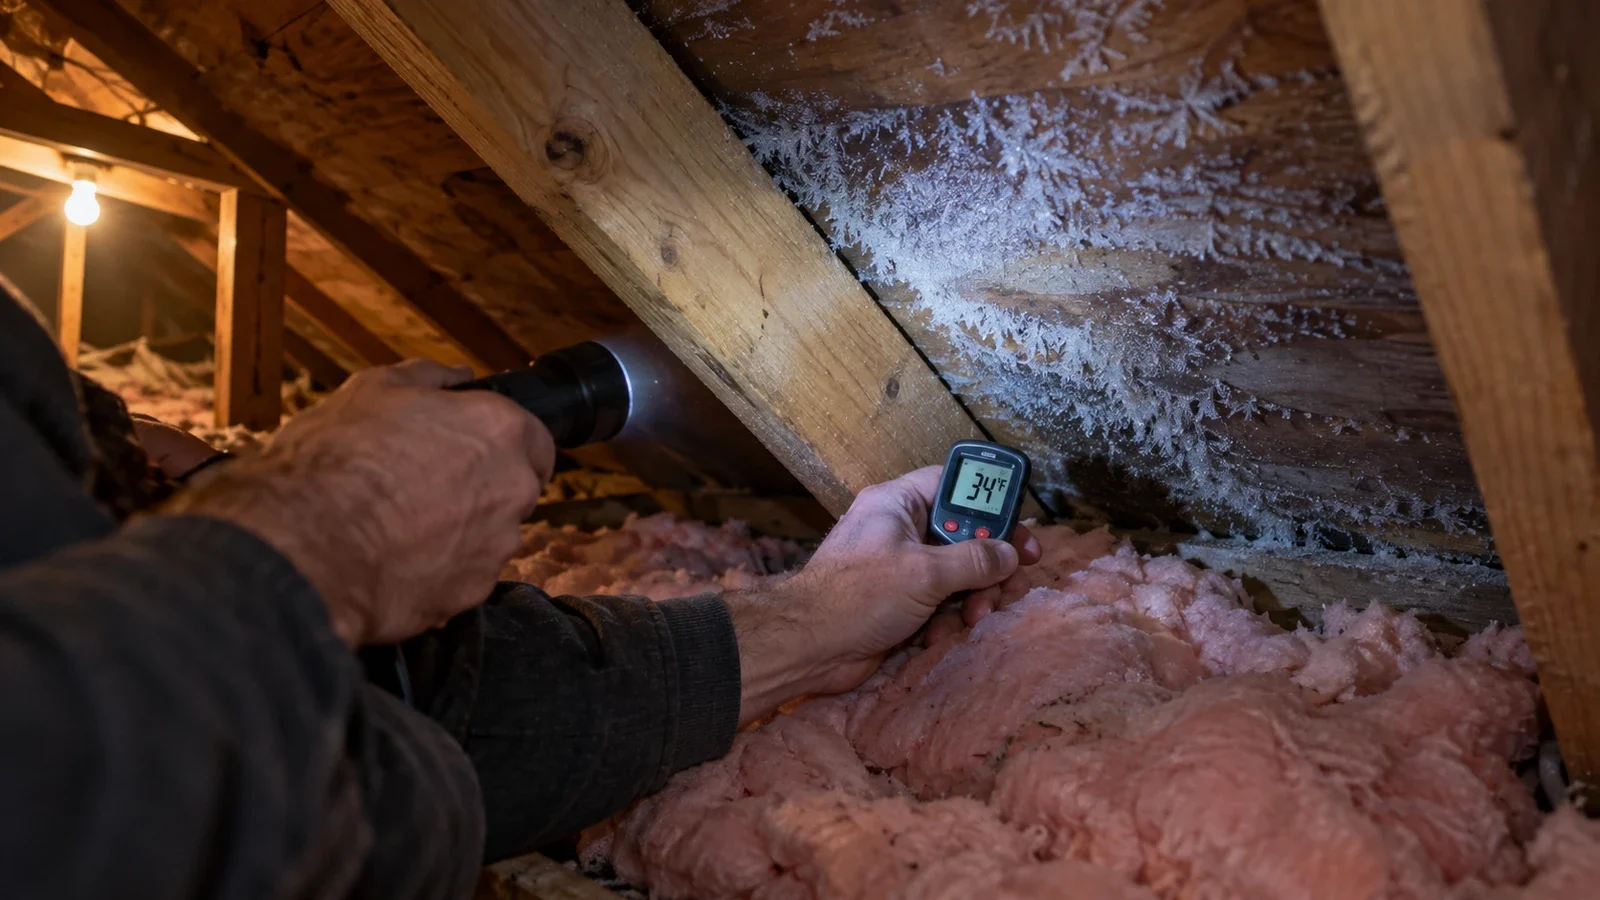
An ice dam forms when heat escaping through your ceiling melts snow on the upper roof, that meltwater runs down to the cold overhang past the heated wall line, and refreezes into a ridge that backs water up under your shingles. The weather triggers it, but the actual cause almost always traces back to heat loss through the attic floor — which means the fix is in your attic, not on your roof.
Where the heat is actually escaping
Warm air rises and finds every gap it can: recessed lighting cans, the attic hatch, plumbing stacks, chimney chases, top plates where interior walls meet the ceiling, and bathroom or kitchen exhaust ducts that vent into the attic instead of outside. That warm air raises the temperature of the roof deck above it just enough to melt the snow sitting directly over those leak points, while the rest of the roof stays cold — which is exactly the pattern that produces a dam rather than even melting.
The insulation number that actually matters
Attic insulation should be upgraded to at least R-40 in most climates, and R-60 or greater in the coldest climate zones. Many older homes are sitting at R-19 to R-30, which is well short of what current guidance recommends for ice dam prevention specifically — not just general energy efficiency. Before adding insulation on top of what's there, air-seal the leak points listed above first; adding insulation over an unsealed leak slows heat loss slightly but does not stop the warm air plume that causes localized melting.
The ventilation ratio you're aiming for
Code minimum under the International Residential Code is 1 square foot of net free ventilation area for every 150 square feet of attic floor space, or a more efficient 1:300 ratio when intake and exhaust are balanced and a vapor retarder is present. In practice this means matched soffit intake vents at the eaves and ridge or roof exhaust vents at the top, working together to keep the entire underside of the roof deck close to outdoor temperature rather than letting it get warmed unevenly by trapped attic heat.
| Component | Target |
|---|---|
| Attic insulation (most climates) | R-40 minimum |
| Attic insulation (coldest zones) | R-60 or greater |
| Ventilation ratio (unbalanced) | 1:150 net free area |
| Ventilation ratio (balanced intake/exhaust + vapor retarder) | 1:300 net free area |
The roof rake is damage control, not a fix
After a heavy snowfall — typically 6 inches or more — use a roof rake from the ground to clear snow from the lower 3 to 4 feet of roof starting at the eaves. This removes the snow that would otherwise melt against the cold overhang and feed a dam, and it is genuinely useful during an active storm cycle. But raking treats the symptom for one storm; it does nothing about the heat loss that will cause the same pattern again next time it snows. Do not climb onto the roof to do this — work from the ground with a roof rake with an extension pole.
A practical order of operations
- Air-seal attic penetrations first — recessed lights, plumbing stacks, the attic hatch, top plates — using fire-rated caulk or foam as appropriate for each penetration type.
- Confirm bathroom and kitchen exhaust fans vent all the way outside through the roof or wall, not into the attic space itself.
- Add insulation to reach at least R-40, more in cold climates, using baffles at the eaves to keep soffit vents from being blocked by the new insulation.
- Verify soffit and ridge or roof vents are clear and sized to hit roughly a 1:300 ratio with balanced intake and exhaust.
- Keep a roof rake on hand for storm-by-storm snow removal on the lower roof edge as a backup, not a substitute for the steps above.
Ice dams and roof warranty claims
Ice dam damage — water backing up under shingles and leaking into ceilings or walls — is frequently denied or limited by homeowners insurance and by roofing manufacturer warranties on the theory that it stems from inadequate attic ventilation or insulation rather than a defect in the roofing material itself. If you file a claim for ice dam water damage, expect the adjuster to ask about your attic's insulation and ventilation condition, and be prepared for a partial denial if the underlying attic conditions clearly caused the dam.
Signs your attic already has a heat-loss problem, before winter proves it
- Snow that melts unevenly off your roof — clear patches over rooms below while the rest stays snow-covered — points directly to a heat-loss spot underneath.
- Frost or moisture on the underside of the roof deck when you check the attic on a cold morning suggests warm, humid house air is reaching the attic.
- Visible daylight around the attic hatch, or a hatch with no weatherstripping or insulation on its own panel.
- Icicles concentrated at specific points along the eave rather than evenly along the whole roofline.
Will adding more attic insulation alone stop ice dams?
Usually not by itself. Insulation slows heat transfer, but if the actual air leaks (recessed lights, plumbing stacks, the attic hatch) aren't sealed first, warm house air still bypasses the insulation and reaches the roof deck directly.
Do heated cables along the roof edge fix the underlying problem?
Heat cables can prevent ice buildup at the specific spot they're installed, but they treat a symptom and run continuously on your electric bill all winter. They're a reasonable stopgap on a home where attic work isn't immediately possible, not a substitute for air sealing and insulation.
Is ridge venting always necessary to prevent ice dams?
Ridge venting is one common way to hit the required ventilation ratio, but it's not the only method — gable vents, roof-mounted vents, or a combination can work as long as the total net free ventilation area and the intake/exhaust balance meet the target ratio for your attic's square footage.
Bathroom and kitchen exhaust fans are an easy miss
A bathroom fan duct that was supposed to run to a roof or wall cap outside but was instead left disconnected or terminated loosely in the attic dumps warm, humid air directly under the roof deck every time it runs — which is one of the more concentrated heat-loss sources an ice dam inspection turns up. Because this duct is usually hidden behind insulation, it often goes unnoticed until an ice dam or attic frost problem prompts someone to actually look. Check every bathroom and kitchen exhaust duct's actual termination point from inside the attic, not just that the fan turns on.
Recessed can lights installed before airtight IC-rated fixtures became standard are a particularly stubborn heat-loss source, since older cans are often required by their own listing to keep insulation pulled back several inches on all sides — which creates a permanent thin spot in your attic insulation directly above the light. Replacing old cans with airtight, insulation-contact-rated (IC-rated) fixtures removes this restriction and lets insulation sit directly against the fixture, closing one of the more persistent gaps a simple insulation top-up never actually fixes.
If your home has multiple additions built at different times, check each roof section's insulation and ventilation separately rather than assuming one attic inspection covers the whole house — additions are a common source of mismatched insulation depth and disconnected ventilation paths between the original structure and the newer section.